Get Transparent Pricing & Free Estimates!
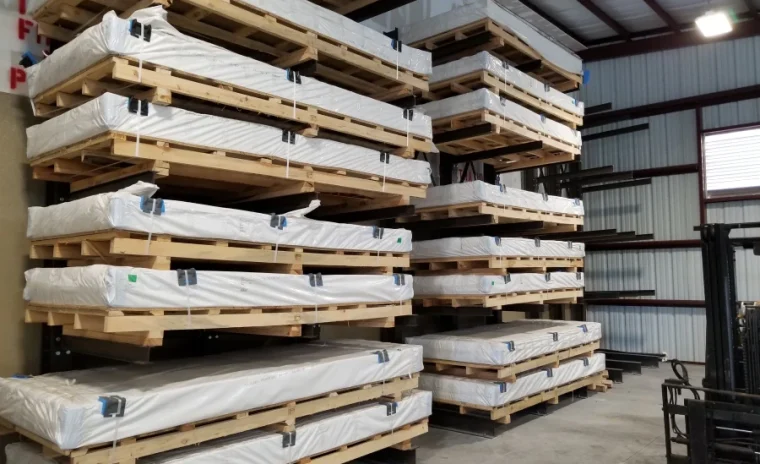
Fiberglass Reinforced Plastic (FRP) panels are a durable, moisture-resistant wall covering commonly used in kitchens, bathrooms, garages, commercial spaces, and utility rooms. Known for their strength, easy maintenance, and resistance to water and impact, FRP panels offer a practical solution for homeowners and contractors looking for long-lasting wall protection.
If you are wondering how to install FRP panels, the process may seem intimidating at first, especially when working with plywood surfaces and finishing corners properly. However, with the right tools, preparation, and techniques, even beginners can achieve a professional-looking installation.
This complete FRP panel installation guide walks you through every stage, from surface preparation and adhesive application to trimming corners and securing panels for a clean, polished finish.
What Are FRP Panels?
Before learning how to install FRP panels, it helps to understand what they are and why they are widely used.
FRP panels are thin, durable plastic sheets reinforced with fiberglass for added strength. These panels are often installed over drywall, plywood, cement board, or other flat surfaces to create a smooth, easy-to-clean finish.
They are especially popular because they are:
- Moisture resistant
- Mold and mildew resistant
- Easy to clean
- Durable against scratches and impacts
- Suitable for high-traffic environments
Because of these qualities, installing FRP wall panels has become a popular option for both residential and commercial spaces.
Tools and Materials Needed
Before beginning your FRP sheet installation, gather all the necessary materials and tools.
Materials:
- FRP panels
- Plywood wall surface
- FRP adhesive
- Plastic rivets or fasteners (if required)
- Corner trim pieces
- Divider trim or edge trim
- Silicone sealant
Tools:
- Measuring tape
- Circular saw or fine-tooth saw blade
- Utility knife
- Caulking gun
- Notched trowel
- Level
- Safety gloves and goggles
Having everything ready before starting helps make installing FRP on plywood more efficient and accurate.
Step 1: Prepare the Plywood Surface
Proper preparation is one of the most important steps in how to install FRP panels successfully.
FRP panels require a smooth, clean, and stable surface for strong adhesion. Since plywood serves as the backing material, inspect it carefully before installation.
Make sure the plywood surface is:
- Clean and free of dust or grease
- Dry with no moisture damage
- Smooth and level
- Securely attached to framing
Fill any major gaps, sand rough areas, and remove protruding screws or debris that may interfere with adhesion.
Skipping preparation can lead to uneven panels, poor bonding, or premature failure.
Step 2: Measure and Plan Panel Layout
Before cutting anything, carefully measure the wall area.
Mark:
- Total wall height and width
- Outlet and switch locations
- Window or door openings
- Corner transitions
Dry-fit the panels first to check alignment and reduce waste.
Planning ahead is essential when installing FRP wall panels, especially in rooms with multiple corners or obstacles.
For a cleaner appearance, many installers start at one corner and work outward.
Step 3: Cut the FRP Panels
Accurate cutting is crucial during FRP sheet installation.
Use a fine-tooth circular saw blade or utility knife depending on panel thickness. Always measure twice before cutting.
When cutting:
- Wear protective eyewear
- Support panels to avoid cracking
- Cut slowly for smoother edges
- Leave a slight expansion gap around edges
If cutting around electrical outlets or plumbing fixtures, trace openings carefully before making cuts.
Precision at this stage helps ensure smoother installation and better trim alignment later.
Step 4: Apply Adhesive Correctly
One of the most important parts of installing FRP on plywood is adhesive application.
Use an adhesive specifically designed for FRP materials. Standard construction adhesives may not bond properly.
Apply adhesive to the plywood using a notched trowel.
Spread evenly across the surface using consistent ridges.
Avoid:
- Applying too much adhesive
- Leaving large uncovered spots
- Using incorrect adhesive products
Proper coverage helps prevent bubbles, loose spots, and panel movement over time.
Work in manageable sections so the adhesive does not dry before panel placement.
Step 5: Install the FRP Panels
Now comes the main step in how to install FRP panels.
Carefully position the panel onto the adhesive-covered plywood.
Press firmly against the wall while checking alignment.
As you install:
- Start from one side and work across
- Use a level to maintain straight placement
- Press out air pockets evenly
- Maintain spacing for trims and expansion gaps
Some installations may also require mechanical fasteners or plastic rivets for additional support, especially in high-moisture or commercial environments.
Continue panel placement section by section until the wall is covered.
Taking time during installing FRP wall panels prevents misalignment and uneven seams.
Step 6: FRP Corner Trim Installation
A professional finish depends heavily on proper FRP corner trim installation.
Corner trims protect panel edges while creating smooth transitions between walls.
There are typically two types:
1. Inside Corner Trim
Used where two interior walls meet.
To install:
- Measure and cut trim to wall height.
- Secure trim before sliding panels into place.
- Leave small expansion gaps inside the channel.
- Ensure panels fit snugly without forcing them.
2. Outside Corner Trim
Used on exposed wall corners.
To install:
- Cut trim to proper size.
- Position securely over corner edges.
- Slide FRP panel edges into trim channels.
- Confirm straight alignment before final bonding.
Proper FRP corner trim installation helps prevent moisture intrusion while protecting edges from cracking or damage.
It also gives the finished wall a clean, professional appearance.
Step 7: Install Divider and Edge Trim
In larger installations, divider trim may be necessary where two panels meet.
Edge trim is used around exposed panel edges near doors, ceilings, or open wall ends.
When installing trim:
- Measure carefully
- Ensure snug panel fit
- Keep lines straight and even
- Avoid forcing panels into channels
Trim pieces not only improve aesthetics but also increase durability by protecting exposed edges.
Step 8: Seal Edges and Joints
After panels and trim are installed, apply silicone sealant where moisture protection is needed.
Focus on:
- Corners
- Seams
- Sink backsplashes
- Wet areas
- Around fixtures
This step is especially important in bathrooms, kitchens, utility spaces, and commercial wash areas.
Sealing helps prevent water penetration behind panels and extends installation life.
Common Mistakes to Avoid
When learning how to install FRP panels, avoiding common errors can save time and frustration.
1. Skipping Surface Preparation
Dirty or uneven plywood may reduce adhesive performance.
2. Poor Measurements
Incorrect cuts can waste material and create visible gaps.
3. Using the Wrong Adhesive
Always choose adhesive designed for FRP materials.
4. Ignoring Expansion Gaps
FRP expands and contracts slightly with temperature changes.
5. Improper Corner Trim Installation
Rushed trim work often causes visible seams and poor alignment.
Following a complete FRP panel installation guide helps eliminate many beginner mistakes.
Final Tips for a Professional Finish
To get the best results while installing FRP on plywood, remember these helpful tips:
- Dry-fit everything first
- Work slowly and carefully
- Keep cuts clean and precise
- Check alignment frequently with a level
- Do not rush adhesive curing time
- Finish corners neatly with proper trim pieces
Patience goes a long way toward achieving a polished, long-lasting result.
Final Thoughts
Learning how to install FRP panels on plywood may seem complicated at first, but with careful preparation and the right approach, it becomes a manageable DIY project. From proper adhesive application and accurate cutting to secure FRP sheet installation and clean FRP corner trim installation, every step contributes to a durable and attractive finish.
Whether you are installing FRP wall panels in a kitchen, bathroom, garage, or commercial space, following a reliable FRP panel installation guide can help you avoid common mistakes and achieve a professional appearance. By taking time to prepare surfaces, align panels correctly, and finish corners properly, homeowners and DIY installers can enjoy durable, easy-to-maintain walls for years to come.